Pages

Monday, February 28, 2011

Pork Extravaganza Part 2 : Healthy Fried Rice and Pork Tacos


It's all about the selling pitch, I find; I'm talking about whether my kids will eat what is prepared for them or push the plate away (arggghh!). This blog may primarily be about family friendly food, but be under no illusions, I do not have perfect eaters in this house and neither am I the perfect Mum. I have to use all the strategies under the sun to "sell" the food I prepare, but then I try not to hover or force them to eat it. There is a general rule, eat it or go hungry until the next meal (unless they are sick).

Anyway, hence the pink sauce. Having 2 young girls in the house, we are living the pink years. So I work it to my advantage, whenever possible. The sauce is actually salmon colored, thanks to smoked paprika, but my pitch seemed to excite the girls into taking at least their first bite. Then they realised their dinner was tasty.

If you read my previous Pork Post, you'll know it all started with a roasted stuffed pork loin. I didn't get my act together in time that night, to present that to my kids, as dinner. That night they had wholewheat gnocchi, pesto and corn. Point proven; not the perfect Mum.

I've taken some artistic licence with the tacos; the consistency is not what you'd expect but I wanted to disguise the vegetables. My youngest is going through a picky vegetable phase so the squash was my choice. Corn, tomatoes, peppers (roasted or not), even peas would work nicely/ nicer here.

Anyway, here are my 2 leftovers options:


Pork Tacos with Pink Sauce

Serves 4

Ingredients for the Pink Sauce

approx 1 cup reduced fat sour cream
1 teaspoon smoked paprika
approx 1/4 cup freshly squeezed lime juice (approx 1 lime)
1/2 teaspoon salt

Ingredients for the Tacos

1 tablespoon olive oil
1 medium onion, diced
1 teaspoon jalapeno pepper, diced finely (or some chilli powder, flakes or hot sauce, to taste)
2 cloves of garlic, diced finely or minced
1 1/2 teaspoons ground coriander
1 teaspoon ground cumin
1/2 lb leftover meat (diced finely)
1 package frozen winter squash, defrosted (substitute roasted peppers, cherry tomatoes or corn)
1 cup vegetable broth (or chicken if you have it)
1 can black beans (rinsed thoroughly to remove some sodium)
8-10 small 6" tortillas (I always prefer wholewheat to corn)


Directions

  1. Whisk together the pink sauce ingredients and set aside
  2. Heat the oil in a deep sided pot on medium high.
  3. Add the onion and fry for 3-5 minutes until softened
  4. Add the jalapeno, garlic and spices and cook for a further 3 minutes until fragrant
  5. Add the meat and cook a further 2-3 minutes then add then add the squash and broth. 
  6. Add the beans, stir gently to combine and add more broth if it needs it, to gain the consistency you like for your filling  
  7. Heat the tortillas in the microwave, wrapped in a paper towel, on high for 2 minutes
  8. Serve with the pink sauce and either guacamole or simply avaocado on the side
Enjoy!


Healthy Fried Rice

(sorry no photo!)

Serves 4

Sauce Ingredients

1/4 cup low sodium soy sauce
3 tablespoons mustard (I used a garlic mustard)
2 tablespoons toasted sesame oil
2 tablespoons honey
1 teaspoon garlic (I omitted, as garlic mustard used)
1/4 teaspoon red pepper flakes (to taste)
3 tablespoons water

Ingredients

1/2 medium onion, chopped
1-2 cloves garlic chopped finely or minced
4-5 cups chopped raw veg of your choice (I used carrots and corn; it was all I had left!)
2 cups cooked grains (I used brown rice but Lorna suggests barley or quinoa)
1-2 cups cooked meat (or scrambled egg)
1 tablespoon freshly grated ginger


Directions

  1. Mix together the sauce ingredients and set aside (this will be too much but will keep for a month in the refrigerator)
  2. Heat a tablespoon of oil in a wok or a large pot and add the onion and garlic. Fry for 2-3 minutes until softened then add 1/4 cup water and the remaining veg.
  3. Cover the pot and steam the veg for approx 3-5 minutes depending on the vegetables you are using.
  4. Add the rice, meat and ginger. Stir to combine and heat through
  5. Add enough of the sauce to coat everything.
Enjoy!

Sunday, February 27, 2011

Pork Extravaganza


I've been pondering on how to make my dinners more exciting for the blog; but then I remembered, that's the whole point. They're family dinners! They're supposed to tasty, nutritious and quick to prepare, not Michelin star worthy. So I thought I'd give an example of dinner in our house for last 3 nights.

This story starts with a lowly 2lb pork loin. I have a bunch of good tenderloin recipes but I didn't have a recipe I loved for pork loin, so I took advice from Martha Stewart, Everyday Food. Pork Loin with Dried Fruit and Chestnut Stuffing. http://www.marthastewart.com/recipe/pork-loin-with-dried-fruit-and-chestnut-stuffing

This one is definitely a keeper. I didn't change it much and its actually dinner party worthy. The pork is stuffed with cooked chestnuts and dried fruit. I used apricots and cherries and it was really delicious. I served it with roasted potatoes and I defrosted a tupperware of sweet and sour red cabbage, that I had made a huge batch of, a while back.

Needless to say there were lots of leftovers, so come night 2 I reached for my usual leftover pork idea; fried rice. Except this time, I used the "Whole Grains for Busy People" book, by Lorna Sass. I can't get enough of this book, at the moment. I've actually borrowed it from our library and renewed it twice; I just can't bear to give it back. Time to fork over some money at Borders I think. Anyway, I was intrigued by her take on fried rice; she doesn't use egg but her sauce looked and indeed turned out to be, totally mouth watering.

Finally, tonight, there was still pork leftover and another starred recipe in Lorna Sass's book got the treatment; tacos. I took a lot of artistic license with her recipe, but was drawn to it by the smoked paprika sour cream. It's supposed to have ground chicken as the meat and cherry tomatoes, however I had leftover pork and cherry tomatoes do not darken the door of our house until they're in season. 

I added black beans, frozen pureed winter squash and changed up the spices a bit but all good. The tacos were wolfed down by my 4 year old and eaten via the "pulling everything apart to check what it is" method, by my 2 year old. My husband and I loved them too.

All in all 3 easy, tasty and yet different meals out of one base ingredient. Part 1 is below, I'll publish part 2 and 3 during the course of this week.


Pork Loin stuffed with Chestnuts and Fruit


Ingredients

1 boneless pork loin (I used a 2 lb one, bigger would work just fine)
approx 1/2 cup cooked chestnuts, chopped
approx 1/2 cup dried fruit of your choice, chopped
salt and freshly cracked pepper
1 tablespoon olive oil
2 teaspoons ground coriander or 1 tablespoon freshly cracked coriander seeds

Gravy Ingredients

3/4 cup dry white wine
2 teaspoons Dijon mustard
approx 14fl oz chicken broth (low sodium)
1 tablespoon butter

Directions

  1. Preheat the oven to 450°F
  2. Place the pork on a chopping board and slice lengthwise, parallel to the work surface. Do not cut right through; you should have one large rectangular piece of pork. 
  3. place 4 or 4 pieces of kitchen string underneath the pork ready to roll and tie it back together after the stuffing is in place.
  4. Mix together the chestnuts and fruit and place them mixture on top of the pork. Push it gently to adhere and make it easier to roll. 
  5. Roll up the pork, overlapping slightly and tie it together.
  6. Rub the pork in oil and sprinkle with salt, pepper and coriander
  7. This can be made ahead to this point and refrigerated for up to a day.
  8. Place it in the oven for approx 40 minutes or until a thermometer reads 145°
  9. Cover the meat with foil for 10 minutes while you make the gravy
  10. Place the roasting pan on the stove and add the wine. Stir to get the tasty bits released and reduce the wine a little for 5 minutes.
  11. Add the mustard, broth and reduce for another 5 minutes.
  12. Remove from the heat and add the butter.
  13. Drizzle over the meat

Watch this space for Healthy Fried Rice and Pork Tacos with Pink Sour Cream.

Recipes will be posted this week

Enjoy!!

Tuesday, February 22, 2011

Scottish Oatcakes


More on the snacks theme;
I am beyond excited! I've just made real oatcakes and they're delicious! Ahhh, oatcakes, strong cheddar and a good chutney or pepper jelly or oatcakes, smoked salmon, a squeeze of lemon juice and fresh cracked black pepper, ahh, oatcakes and pate. A glass of your favorite red wine and you have a perfect appetizer, snack, lunch, dinner. Need I go on? Probably yes, if you're not British or haven't spent much time there.

Oatcakes are robust crunchy crackers made, quite simply, of oats, wholegrain flour, water, butter and baking soda. Traditionally, actually, they are made with lard but I just can't bring myself to do that. They are not sweet, although as I was researching recipes I did find sweetened versions. For me though, the taste has always been a savoury one. Don't expect a the sweetness of a wheat thin, or you'll be sorely dissapointed.

As long as I've lived in the US, I've had visitors from home bring over some oatcakes; it's the food from home that I miss most. I have intended on baking them for years, but procrastination sometimes gets the better of me.

In explanation, my husband is Scottish and I lived in Scotland for about 7 years. I also spent many a summer in Scotland as a child and my Mum's sister and family have lived there all my life. Have I justified my connection yet?

A word about this recipe; I based it on one from a website called undiscoveredscotland

http://www.undiscoveredscotland.co.uk/usrecipes/oatcakes/index.html

and the recipe calls for medium oats. If my memory serves me right, these are a little smaller than the typical old fashioned rolled oats in the US stores. So I pulsed mine in the processor about 10-15 times. Here's what they looked like after pulsing:


Scottish Oatcakes


Yields approx 24


Ingredients

2 1/2 cups/ 8oz/ 230g medium oatmeal
1 3/4 cups/ 8oz/ 230g wholewheat flour
1 teaspoon baking soda
3/4 teaspoon salt
4 tablespoons/ 1/4 cup/ 2 oz butter (melted)
1 1/2 cup 50ml boiling water


Directions

  1. Preheat oven to 400 °F/ 200°C
  2. Line a cookie sheet/ baking tray with parchment paper
  3. Melt the butter over a low heat, in a small pan
  4. With clean hands, mix together the dry ingredients in a large bowl
  5. Add the butter and boiling water and stir together until a dough forms
  6. Firmly form the dough into a 4 balls, before rolling, so it did not crack too much upon rolling.
  7. Roll out each ball to 1/2cm/ 1/4" thick, on a surface with oatmeal scattered on top (as you would with flour when rolling cookie dough)
  8. Cut out the shapes and place on the tray.
  9. Re-form the off cuts and roll out into cookies also. I hand shaped some of mine at the end to get the most of my dough.
  10. Bake for approx 20 minutes or until golden and and crisp
  11. Cool on a wire rack.

 
In a word, these are exceptionally easy and therapeutic to make. Any rustic recipe like this is a great one for the kids to help; the rolling out and shape cutting is all fun, although if I'm in a time pinch next time I intend to just roll into a circle and cut wedges instead of circles. Less scraps to deal with that way.

Crack open the wine, get out the cheese and Enjoy!


Monday, February 21, 2011

Snacks...


We are big snackers in this house; I'm afraid I have inflicted the need for regular snacks on my children. Having said that, modern thinking is we should be eating 4-6 small meals a day so perhaps they won't throw that up at me, as childhood baggage, in 20 years time.

Anyway, I have long been perplexed by feeding my kids "kid snacks". Here in the US, there are so many foods marketed to kids with nothing close to real food in the ingredients. Apart from fruit, we eat a lot of crackers and granola bars for snacks. Finding a good recipe for a granola bar, has long been on my research list, but to date I have nothing that I'm particularly proud of, so nothing to share on that front today.

However, I've made it my mission in the next few months to share some really great snack recipes. I will continue to work on the granola bar and good cracker recipes, but in the meantime; I have a healthy muffin recipe to share.

You may notice there's a strong theme in my baking. My first inclination is always to seek out a way to "choclify" a recipe. The recipe below started as a blueberry muffin recipe, but I've justified a way to add chocolate by significantly reducing the sugar, adding orange juice and zest and increasing the whole grains.

I've been considering a chocolate orange muffin for a couple of months; I made a delicious attempt a few weeks ago, but I was not content with the amount of butter in them. So here's a healthier version which still reminds me of the original chocolate orange combination in my life; Terry's Chocolate Orange. Green and Blacks Maya Gold eat your heart out!

All in all, a very pleasing muffin according to my husband and kids. Sufficiently sweet for a instand lift but followed up with enough wholegrains to keep everyone going until the next meal.


Chocolate Orange Muffins


Yields approx 24 muffins


Ingredients

1 1/4 cups/ 6oz/ 170g all purpose flour
1 1/4 cups/ 5.5 oz/  155g whole wheat pastry flour
1 cup/ 3.2oz/ 90g quick cooking oats (not instant) or place old fashioned oats in the processor for 10-15 pulses
1/2 cup/ 3.5 oz/ 100g  granulated sugar
1 tablespoon (yes!) baking soda
1 teaspoon baking powder
1/4 teaspoon salt
2 cups/  480ml low fat plain yogurt or buttermilk
1/2 cup/ 120ml orange juice (preferably freshly squeezed)
zest from 2 oranges
2 teaspoons vanilla extract
1 large egg, beaten
3/4 cup chocolate chips (bittersweet, 60% or higher cacao)


Directions

  1. Preheat oven to 400°C/ 200°F
  2. Grease or line 2 twelve cup muffin tins
  3. Measure the first 7 dry ingredients into a large mixing bowl and whisk to combine well. I actually used my clean hands to lightly mix because the oats make it more difficult to combine.
  4. In another mixing bowl whisk together the buttermilk or yogurt, orange juice, zest and egg.
  5. Add the wet ingredients to the dry and stir until just combined. Do not overstir!
  6. Fold in the chocolate chips.
  7. Using an ice cream scoop, fill the muffins tins to approx 2/3 full.
  8. Place in the oven and bake for approx 15 minutes or until just turning golden on top.
  9. Cool the muffins in the pan for 5 minutes then remove to a cooling rack.
Enjoy!!


Notes on the recipe:

  • Tasty additions would be a 1 teaspoon of cinnamon and a 1/4 of nutmeg. I will try this next time and report back.
  • A word about flour when baking; 90% of the time you can substitute at least 1/2 whole wheat flour instead of all purpose flour. I tend to use whole wheat pastry flour which is made from white wholewheat flour. The "white" does not mean that the flour has been stripped of it's "whole grain" quality, it's just a different variety of wheat. It makes a more tender baked product but still has the same amount of fiber. If you can't get that flour, feel free to replace with regular wholewheat flour, the result may just be slightly denser.
  • A word about chocolate and chocolate chips; I always use bittersweet chocolate in my baked goods, unless otherwise specified. I usually buy the ghirardelli 60% chips and when they're on sale buys them in bulk!

Wednesday, February 16, 2011

Mini Sticky Chocolate Cakes


It was my (uh um) 40th birthday yesterday. 2 reasons I'm writing about that; cake and photography. For all those of you who have been offended by my amateurish photography to date; take heart. My girls got me a tripod and a book on food photography for my birthday. So hang on in there while I read up and all should improve!

Cake; well, my husband was totally at a loss as to what to do about cake. While he can cook, he really doesn't bake, so making one wasn't an option. Also, knowing my active membership in the "nasty ingredient police", he was nervous to buy one. A birthday cake filled with trans fat and artificial flavors is not my idea of a celebration.

So, no cake. I planned on making my own actually, call me nuts, but I'd have been happy to if I'd had a moment. Instead, I spent the afternoon with my kids at the merry go round and in the Disney store. When they're happy, I'm happy!

Anyway, I'll admit I have been thinking of cake rather a lot recently, and I have a chocolate and zucchini recipe for sticky chocolate cake, that I've been meaning to try for months.

http://chocolateandzucchini.com/archives/2009/05/sticky_chocolate_cake.php

Clotilde's recipes are amazing and always a little different. Check out her blog if you haven't before.

Anyway, lets talk more about the key to the stickiness; prunes, or to give them their "post rehab" name, dried plums! For those US readers, please read on. Give prunes another try. They are not only good for "getting things moving", if you know what I mean. They have an amazing depth of flavor which goes perfectly with chocolate, and when you use them you can invariably cut down the fat and sugar in the baked product. Quite honestly I love them on their own. They do not need to be dressed up, but dressed up they are, in the following recipe.

Many years ago, Delia Smith, (the UK's answer to Julia Child), introduced me to the pairing of chocolate and prunes, with her Chocolate Prune Brownies. Her "How to cook: Book 2" has a whole section on the pairing. The recipe became my "go to" brownie recipe of my 20's. Shortly after starting a new job here in NYC, I brought in a batch for a birthday celebration in work. I was so proud of my delicious brownies and they went down a storm in the office.

Then, I was asked what was my secret? Prunes, I innocently replied, unaware of the stigma attached to the prune in the US. Well, suffice to say, I went home with the rest of the brownies. My boss was most perturbed, as he had had 3 by this point; how to impress a new boss! They were all under the impression you should only eat prunes if your Doctor had recommended them! I can assure you, nobody's afternoon was ruined by too many prunes.

I have been amused in recent years here, to see the prune producers, changing their marketing strategy to "dried plums", in an effort to fool the US market into eating them again.

Anyway, my daughters were both at preschool this morning, so I ignored the housework and errands needing attention and made cakes. I suppose they're really muffins but they really are quite light and cake-like. Plus, since it's my birthday season, I just have to call them cakes!

As usual, I couldn't stick to the recipe; Clotilde recommends steeping the prunes in your favorite brandy; I used cranberry juice for my kids sake. I substituted half of the flour for whole wheat pastry and added molasses instead of maple syrup. I also used dark brown sugar instead of light, all in the hope of achieving a dark and delicious looking cake.

The cakes are totally delicious as they are, but I plan to build on this recipe in future. They would be amazing with chocolate ganache on top, and/or (nod to Delia) chocolate dipped prunes on top.
I also think they could accommodate more cocoa powder to good effect. When I try any of these ideas, I will add on to this post to share the love!


Mini Sticky Chocolate Cakes


Yields 12 muffins/ mini cakes

Ingredients

8 oz/ 230g prunes (dried plums), pitted
1/3 cup/ 80 ml cranberry juice (substitute brandy, pomegranate juice, black tea)
1/2 cup/ 120ml buttermilk or plain yogurt
1 egg lightly beaten
6 tablespoons/ 75 g dark brown sugar
3 tablespoons/ molasses (substitute maple syrup or treacle)
1/2 cup/ 60g all purpose flour
1/2 cup/ 60g whole wheat pastry flour
1/2 teaspoon baking soda
1/2 teaspoon baking powder
1/4 teaspoon sea salt
4 tablespoons unsweetened cocoa powder (sifted after measuring)
4 oz/ 115g bittersweet chocolate chips or chopped from a bar.


Directions

  1. Place half of the prunes in the soaking liquid of choice and warm slightly. Leave to cool and soak. (Honestly, overnight would be best, but I didn't have the time)
  2. Preheat the oven to 350°F/ 180°C
  3. Grease the muffin pan
  4. Place the remaining half of prunes and the buttermilk in the food processor and process until smooth
  5. Transfer the prunes and buttermilk to a large mixing bowl and whisk in the eggs, then the sugar, then the molasses.
  6. Cut the soaked prunes in half with scissors and set aside. Discard the remaining liquid.
  7. In another mixing bowl, whisk together the flours, cocoa, baking powder, soda, and salt.
  8. Add the dry ingredients to the wet and stir until just combined. No not overstir.
  9. Finally fold in the chocolate chips
  10. Using an ice cream scoop, fill the muffin tins to about 2/3 full. Then squish a few prune halves in on the top of the batter.
  11. Bake in the center of the oven for 15-18 minutes or until a tester comes out clean
Enjoy!

p.s. I have just kicked these up a notch by smearing the tops with melted chocolate and a dollop of sour cream. Then I plopped another half prune on the top. Amazing.

Here's what they looked like


Saturday, February 12, 2011

My husband's tasty pancakes


My first post.  I’m Kat’s husband.

After being on 10 different planes in the past four weeks I am home for a while and my cousin “Auntie Ticktoria” is visiting.

I’ve been addicted to the statistics of the blog while I’ve been away; I knew that if a new recipe was posted I was receiving a sign that all was well, back at the ranch. 1,065 page views to date… I could bore you with all sorts of other stuff like the fact that people from Spain and Scandinavia have viewed the blog…..but I’ll stop.

This morning the girls were very excited about the prospect of breakfast with "Auntie Ticktoria". We agreed to make pancakes, rather than my usual trip to get bagels with the girls while Kat has a lie in,   I found this recipe on the net a while ago and it was much better than any previous pancake recipe or mix I have ever used. 

Consistent with the other recipes on this blog, I've made it a  bit healthier than the original recipe.  I make the batter with whole-wheat flour rather than regular flour.  I think this started because the first time I made the recipe I couldn’t find any white flour in the house, (doesn’t mean there wasn’t any, just that I couldn’t find it….). Although butter is not the healthiest part if the recipe, it’s a worthwhile addition of flavor that can’t be replaced by oil or nonstick sprays. The caramelized banana is one of the best things about these pancakes and the butter really helps that flavor.

So here goes.

First of all make sure you have made your cup of coffee or whatever else gets you going in the morning.


Saturday morning pancakes


Ingredients


1 cup/ 4oz/ 110g wholewheat flour
1/2 tablespoon sugar
1 teaspoon baking powder
1/2 teaspoon baking soda
pinch of salt
1 cup/ 240 ml buttermilk
1 egg, lightly beaten
1 banana, sliced thinly

Directions

  1. Turn the oven on low to keep the pancakes warm
  2. Measure out the dry ingredients and whisk them together in a mixing bowl.  
  3. Add the eggs and the buttermilk and stir with a wooden spoon until you have a smooth batter.  This morning my batter was a bit too thick, probably because the air is very dry at the moment, so I added some more buttermilk. 
  4. Put the skillet on the stove on medium put a knob of butter on to melt. 
  5. Don’t forget to put the exhaust fan on, so the kitchen is filled with the smell of pancakes and not the fumes of cooking. 
  6. Chop up the banana while the skillet warms up and then add some butter to the pan.  
  7. Pour some pancake batter onto the skillet, then place the sliced banana on top.
  8. Cook for about 2 minutes on each side.  This will vary depending on how hot your pan is, but if it’s too hot there will be smoke and the middle of the pancakes will be raw.  If the pan it too cold the pancakes will just take forever and the banana will not caramelize.  
  9. Each of the pancakes will absorb some butter so keep an eye on how much is in the pan and add a small amount before starting a new pancake if necessary.
I made double the recipe (pancakes freeze apparently) and we ate about 2/3 of the pancakes between three adults and the two kids.

Where can you go wrong?  Just don’t forget to wash the dishes after you are finished cooking.


A couple of tips:

  • This is a great recipe to get the kids involved in stirring
  • To freeze the pancakes, place a piece of parchment paper between each pancake and place the pancakes in a ziplock bag. To defrost, lightly toast.
  • The banana can obviously be substituted for another fruit such as blueberries, strawberries, apples or pears

Wednesday, February 9, 2011

Luxurious Leek and Potato soup


Despite the massive interest in my last chocolatey post, it seemed time for a shift in gear. After the excess of the past weekend, I've been working on perfecting a leek and potato soup.

The last day I made leek and potato soup, a friend coincidentally asked me for a good recipe. I was embarrassed and frustrated to say I couldn't give her one because I was really unenamoured with my creation that day.

I had a couple of problems; it pains me to peel a potato. Not only do I resent the time, but, as each piece drops away, I imagine the nutrition from the potato doing the same. So, I made my last leek and potato soup with the peel on. Needless to say, I just could not get the texture smooth enough for my liking.

The other problem is, most recipes will instruct you not to brown the leeks or potatoes, in favor of the lightest colored, aesthetically pleasing soup. Now as a rule I will always favor taste over beauty, when cooking, but with the last soup, I followed the directions and didn't brown.

Bottom line, the soup was bland and " bitty". Research began, then testing and here we go.

I'm afraid it comes back to my Irish roots; everything is better with bacon! However this time, I had some pancetta in the fridge (that's the American influence) and I decided to start off the soup with that as my flavor base. A few cloves of garlic, fresh thyme and the crispy pancetta on top for serving. All good.

So, Jen Peterson, this one's for you!


Luxurious leek and Potato Soup


Ingredients

4 oz/ 110g pancetta or bacon (diced into small pieces)
1 tablespoon olive oil
6 large leeks (approx 1 lb/ 450g  or 8 cups) halved lengthways and thinly sliced
3 cloves of garlic, diced or minced
2 lb/ 900g potatoes, peeled  and diced
6 cups/ 1420ml of low sodium chicken broth
1 teaspoon fresh thyme (chopped)
Salt and pepper


Directions

  1. Heat a large, heavy based, deep pan on medium high. Add the pancetta and fry until crispy
  2. Remove the pancetta and set aside. Discard all but 1 tablespoon of the fat rendered
  3. Add the olive oil to the pan and when hot, add the leeks and garlic
  4. Cook until softened; about 10 minutes.
  5. Add the potatoes and cook a further 5 minutes.
  6. Add the stock and stir well to scrape up the tasty bits at the bottom of your pot.
  7. Bring up to a boil and simmer for about 15 minutes or until the vegetables are cooked.
  8. Add the thyme and puree using the hand blender
  9. Taste and adjust the seasoning
  10. Serve with the reserved pancetta crumbled on top.
Mmmmmmm....

A couple of tips

  • Leeks are best washed after chopping finely. Place them in a large bowl of cold water and agitate. Let the dirt settle to the bottom of the water, then scoop them out from the top of the water.
  • Dried thyme would make a fine substitute too, or another fresh herb such as parsley, chives or even sage
Enjoy!

Sunday, February 6, 2011

An Excuse for Double Chocolate....


Time to celebrate; my husband is home! Yippee! Single parenting is over for another day (yes he's away again tomorrow night). So bring on the cupcakes!

Actually truth be known, I mustn't steal the thunder from my friend Tammi; it's her birthday. It didn't seem fair to me that she hosts her own birthday/Super Bowl party, so the least I could do is bring her some birthday cakes!

I toyed with many different ideas for today's recipe, but it all comes back to a tried and tested chocolate cupcake recipe that I have made repeatedly for birthdays. These cupcakes are relatively light and keep well if you need to make them a day ahead. I produced 70 or so for my daughters' joint birthday party in the fall; not to mention sending them to school and making them for their actual birthdays! My point is, it's a well tested recipe! The base recipe comes from the Cooking Light, Quick Baking , 2010 issue, although as usual is given the "Kat ate that" treatment.


I had a peaceful morning on my own baking; that's the ultimate relaxation for me. My husband had taken the kids off campus, for a chunk of time, for me to "be" in my kitchen. After a leisurely breakfast without getting up and down 10 times to refill milk, mop up spills, etc. etc., I embarked on the cupcakes.

My only caution with this recipe is, that it only makes 10 cupcakes. I doubled the recipe for the Superbowl party this afternoon and scraped out only 21 cupcakes from the recipe. Fine for a normal day, but not enough for the party.

So, with an empty house, I realised I had the perfect opportunity to try out one of the boys at "Baked Explorations" creations; Oatmeal Chocolate Chip Cake with cream cheese frosting. Does that not sound fabulous? I like to be on my own when trying out their recipes. I feel to do them justice, I don't want to manage the two tikes and where their fingers are, while baking a new and special recipe.

It's an interesting one; the oatmeal and butter are soaked/melted together with boiling water and left to stand for 30 minutes. Then they are added to the rest of the ingredients. The cake effectively turns into a cross between a blondie and and oatmeal chocolate chip cookie. Divine!! I reduced the sugar, didn't add the suggested liquor (very unlike me!) and substituted some wholewheat flour. The Baked boys suggest a cream cheese frosting, although in my opinion it really makes the whole thing almost too sweet because there are a lot of chocolate chips in there. All a matter of taste though, and far be from me to criticise the Gods of baking.

Anyway, on to the results

Chocolate Cupcakes

Yields 10

Ingredients

1 cup all purpose flour
1/3 cup unsweetened cocoa
1 teaspoon baking soda
pinch of salt
2/3 cup granulated sugar
1/4 cup/ 4 tablespoons unsalted butter, softened
2 large eggs
1 teaspoon vanilla extract
1/2 cup low fat buttermilk

Directions

  1. Preheat oven to 350°F
  2. Line a muffin pan with cupcake liners
  3. Spoon and level flour into the measuring cup and sift over a large bowl with the cocoa, baking soda and salt. Then whisk the ingredients to mix lightly
  4. Beat the sugar and butter with an electric mixer for about 3 minutes
  5. Add the eggs, one at a time, then the vanilla. Beat until well combined
  6. With the mixer on low and starting and ending with the flour, alternate adding the flour and buttermilk to the mixer bowl
  7. Mix until just combined; over mixing will make a tough cupcake
  8. Using an ice cream scoop, fill the muffin pan and bake for approximately 18 minutes or until a tester comes out clean
  9. Cool in the pan for a couple of minutes then take the cupcakes out and cool completely on a wire rack
These are a fantastic vehicle for your favorite frosting; I love cream cheese (see below) but I have also gone the simple route in the past and dusted them with confectioner sugar; they looked just lovely.

Enjoy!


Oatmeal Chocolate Chip Cake

based on a recipe in "Baked Explorations, classic American desserts reinvented"


Yields one 9x13" pan

Ingredients

8 oz chocolate chips
1 cup plus 2 tablepoons all purpose flour
1/2 cup wholewheat pastry flour
1 cup rolled oats
1/2 cup/ 1 stick unsalted butter, cut into small cubes (cold or softened)
1 1/4 cup boiling water
2 eggs
1/2 cup granulated sugar
1 cup firmly packed dark brown sugar
1/2 teaspoon salt
1 teaspoon baking soda
1 teaspoon baking powder
1 1/2 teaspoon cinnamon

Ingredients for the Cream Cheese Frosting

5 tablespoons unsalted butter, softened
5 1/2 oz cream cheese, softened
2 cups sifted confectioner sugar
1 teaspoon vanilla extract


Directions

  1. Preheat the oven to 375°F
  2. Butter a 9 x 13 " baking dish. The Baked boys recommend a glass one but mine has a frozen sausage and bean casserole in it right now, so I baked in a regular metal baking pan
  3. Soak the oatmeal and butter in the boiling water. Leave for 30 seconds before stirring then stir until the butter has melted. Set aside to cool for 30 minutes
  4. Toss the chocolate chips in a bowl with the 2 tablespoons of all purpose flour (this prevents the chips from sinking when baked)
  5. When the oatmeal mixture has cooled, whisk together by hand, the eggs, then add the sugars, salt, baking soda, baking powder, and cinnamon until combined
  6. Fold in the cooled oatmeal mixture and then the flours
  7. Finally, gently fold in the chocolate chips
  8. Pour the batter into the baking pan
  9. Bake for 40-45 minutes, turning gently, halfway through cooking. When done, a toothpick should come out clean

Directions to make the Frosting

  1. Using an electric mixer, beat the butter until smooth
  2. Add the cream cheese and beat on high until well combined
  3. Sift in the confectioner sugar and beat until smooth
  4. Refridgerate, covered,  for 30 minutes prior to using
A note on the frosting; make sure the butter and cream cheese are at room temperature as they will not become smooth if too cold.

A frosted cake will keep up to 3 days if refridgerated.


Enjoy!


Saturday, February 5, 2011

Warm Crab Dip


It's the end of a long week in this house. The snow and ice have been endlessly annoying and have cramped our social life significantly, but, as promised, the crab dip is here. The kids are perched in front of the latest Disney movie and I have a moment to write up.

I first made this, ridiculously simple, dip for Thanksgiving, when I trotted out a bunch of appetizers during the course of the day, prior to the main event. It was well received by all and so I hit repeat for Christmas. If I remember correctly, even most of the kids ate it too.

The base recipe is from epicurious:

http://www.epicurious.com/recipes/food/views/Baked-Crab-Dip-360830

however I healthied it up a little more by substituting some low fat (or in my case 0% fat) greek yogurt instead of some of the mayo. I do not like a lot of mayo in my food so will generally cut it with some plain yogurt, low fat sour cream, lemon juice or vinegar depending on what I'm making. I changed up the herbs and used roasted peppers instead of fresh.

All in all, a tasty, easy and somewhat healthy dip.


Warm Crab Dip


Ingredients

6 oz/ 170g fresh (or canned) crab meat, well drained
1/2 cup/ 75g diced red pepper (I use roasted sometimes)
1/2 cup/ 25 g finely chopped fresh parsley or basil
1/4 cup/ 60 ml mayonnaise
1/4 cup/ 60 ml reduced fat greek yogurt or sour cream
4 oz/ 115g low fat cream cheese
2 tablespoons fresh lemon juice
1/2 tsp hot sauce
1/4 cup/ 25 g breadcrumbs
1/2 teaspoon grated lemon zest


Directions

  1. Preheat oven to 425°F/ 220°C/ gas mark 7
  2. Mix together all the ingredients except for the breadcrumbs and lemon zest.
  3. Taste and season or add more hot sauce as necessary
  4. Mix the breadcrumbs and lemon zest together.
  5. Transfer to a small baking dish or 2 medium sized ramekins and sprinkle the breadcrumb mixture on top
  6. Place in the oven for 10-15 minutes until golden on top
  7. Serve warm with dippers such as crudites, pita chips, rye toasts or crostinis.
Enjoy!


Wednesday, February 2, 2011

Gingersnap Scones anyone?


Despite promising a game day themed week of recipes, I just have to squeeze in an little something extra. We're onto our 2nd straight snow day, school closure here. Like a lot of the US, we are in the middle of an snow and ice storm. Before I lived in the US, I'd never even heard of an ice storm, much less witnessed one, now they seem all too familiar. What a brutal winter!

So, in an effort to raise spirits, my mind wandered to muffins. My husband is away again; bring on the treats. I'm going to be the size of a house if this weather continues to require so much comfort food. The only problem was I just could not decide which to do; Pear ginger? Chocolate expresso? or maybe even Ginger Snap Scones? Ahhhh, my mouth watered so much with the last one I had to give in! I realised that I bought ginger snaps a couple of weeks ago, after reading the recipe, but forgot to follow through. Seize the moment!

Being Irish, I should be able to make scones with my hands tied behind my back, but they weren't really in my Mum's (quite large) baking repetoire when I was growing up so I've only become adept at them in recent years. I usually make Clotilde's yogurt scone recipe with some add ins:

http://chocolateandzucchini.com/archives/2004/02/yogurt_scones.php

It's significantly healthier than a typical scone recipe but just as tasty. However this time I was drawn to a recipe in a Cooking Light, Quick Baking issue (2010), which used crumbled gingersnaps. I'm a sucker for ginger, particularly in winter so I was sold! I changed it up by substituting in some wholewheat pastry flour and I omited the glaze. I'm an impatient person; I even hate the wait until a cupcake is frosted.


Gingersnap Scones


Uhoh, we're in trouble; there's only 3 of us here and 2 are under 5...


Ingredients

1 cup all purpose flour
3/4 cup whole wheat pastry flour
1/4 cup sugar
1/3 cup crushed gingersnap cookies
1 1/2 teaspoons baking powder
1/2 teaspoon baking soda
1/4 teaspoon salt
1/3 cup chilled butter cut into small pieces
1/2 cup low fat buttermilk
1 large egg, beaten

Directions

  1. Preheat the oven to 400°F and line a making sheet with a sheet of parchment paper
  2. Spoon and level the flours into the measuring cups and then into a large bowl
  3. Add the next 5 dry ingredients to the bowl and whisk well to mix
  4. Add the butter and using either a pastry cutter or your fingers, rub in the butter until there are hardly any lumps left.
  5. Mix the buttermilk and beaten egg together and add to the dry ingredients.
  6. Stir until just moist then get your fingers in and knead lightly a few times on a floured board. You will still be able to see some lumps and bits of flour.
  7. Transfer onto the baking sheet and shape into a roughly 10" circle
  8. Using a large knife, cut the dough into 8 or 10 wedges, but DO NOT separate.
  9. Place in the middle of the oven for approx 15 mins until golden.
  10. The wedges will come apart easily once baked.
  11. Enjoy warm; we had ours plain but they'd be delicious with butter and apricot jam.
Apologies for no metric conversion; short on time. If anyone really needs it let me know and I'll do it.

Enjoy!


Tuesday, February 1, 2011

Super Bowl Food: Chili and Dip

Spinach Artichoke Dip

If there is one main theme of my blog, it would be that tasty food can pretty much always be pulled together without a special trip to the store.

On that note; I promised game day food this week and I shall deliver. However, Trader Joes were all out of sundried tomatoes (very rarely will I write anything negative about that store) so slight change of plan. I am serving spinach artichoke dip instead of the artichoke sundried tomato spread.

I love the concept of the flavors in spinach artichoke dip, but the traditional recipes are just too heavy and fat laden for me to enjoy. I've been making this version for a few years; Ellie Kreiger from the Food Network provided the base recipe; I usually like her approach to healthier eating.

http://www.foodnetwork.com/recipes/ellie-krieger/warm-spinach-and-artichoke-dip-recipe/index.html

However, it did need a little more cheese, greek yogurt and a touch of nutmeg to make it feel a bit less "healthy". It's a fine balance, after all it's still gotta taste good!

My other offering for today's Game Day planning is Chili. It's largely based on one of Jamie Oliver's versions that pulled of the Food network site years ago; the recipe is no longer listed. Anyway, I added a few more veggies, less chili pepper and I used ground turkey this time. The original uses ground chuck.

I always get asked about the chili when someone else tastes it and I think it's due to unusual ingredients and method; it's got a cinnamon stick and sundried tomatoes in it and he recommends you cut up your veggies etc in the food processor. Altogether this gives a smoother texture, which I like and an interesting depth of flavor. I also added more veggies and wine; notice the theme? I believe one cancels the other out, but it's a step in the right direction!

The Chili is freezable for about 3 months; I usually make a double batch (see photo) and feeze in family sized portions.


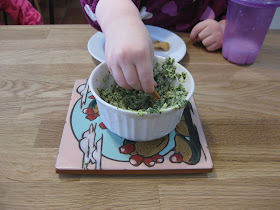
Spinach and Artichoke dip


My 2 year old digging in
This yields a lot; enough for 10-12

Ingredients

1 tablespoon olive oil
1 medium onion, finely chopped
3 cloves of garlic finely chopped or minced
1 (9 oz/ 255g) package of frozen artichokes, defrosted
1 (10 oz/ 283g) package of frozen spinach, defrosted and squeezed of excess liquid
1 cup/ 250ml reduced fat or non fat sour cream or greek yogurt
2 tablespoons mayonnaise
1/2 cup/ 4 oz/ 115g reduced fat cream cheese
4 oz/ 115g shredded/ grated part skim mozzarella (or whatever good melting cheese you have)
1/2 teaspoon salt
pepper to taste
1/4 teaspoon freshly grated nutmeg


Directions

  1. Preheat the oven to 375°F/ 190°C
  2. Saute the onions, over a medium heat, for approx 4-5 mins. Add the garlic and cook for a further 3-4 mins.
  3. While the onions are cooling, put the remaining ingredients in a food processor and process until smooth. Add the onions and pulse a further 4-5 times to mix.
  4. Transfer to a lightly greased baking dish (I used 4 large ramekins, or you could use one large 8" square baking dish)
  5. Bake for 15/20 mins until heated through but not browning on top.
This is delicious served with pita chips, or carrot sticks.

Enjoy!


Kat's Chili


Serves 6


Ingredients

2 medium onions
2 garlic cloves
olive oil
1/2 lb/ 225g carrots (washed not peeled)
2 teasponns chili powder
1 1/2 teaspoons ground cumin
sea salt and pepper
1 lb/ 455 g ground chuck (I used ground turkey this time)
7 oz/ 200g sundried tomatoes in olive oil
1 fresh red chile, deseeded (optional, swap in milder chile or omit)
2 (14oz/ 400g ) cans chopped tomatoes
1/2 cinnamon stick
1 glass red wine
2 (14oz/ 400g) red kidney beans, drained and rinsed well


Directions

  1. Place the onions and garlic and carrots in the food processor and chop.
  2. Using a deep heavy pan or dutch oven, fry up the onions, garlic and carrots in some olive oil until softened.
  3. Stir in the chili powder and cumin and cook for a further 2 mins.
  4. Add the meat and break up well. Cook until lightly browned
  5. Food process the sundried tomatoes (without the oil) and chile and add to the pan
  6. Add the tomatoes, cinnamon stick and wine.
  7. Bring to a boil, then simmer for 1 hour before adding the beans.
  8. Simmer for a further 1/2 hour then allow to sit and develop more flavor.
  9. Test and season as necessary at the end; depending on your tomatoes and beans, there may already be enough salt without adding more.
Enjoy with the usual toppings, rice, cornbread, tacos etc etc etc!